Thursday, March 25, 2010

Hand Lecture

Students at the Academy spent a week learning about the anatomy of the hand and foot. Lectures were packed with information about bones and muscles along with an analysis of morphological anatomy and some insights on constructive drawing principles. We looked at old master paintings and drawings to find evidence of what we learned. Examining works by Michelangelo, Andrea del Sarto, Raphael, Albrecht Durer and others we saw how they masterfully utilized a hierarchy of principles to beautifully render hands and feet.

One lesson that was learned was about the changing appearance of each section of the fingers. The first section closest to the knuckles has a rounded appearance, the center section a more rectangular block-like shape, culminating in the wedge-like shape of the end of the finger. This is clearly seen in this drawing by Albrecht Durer.


Monday, March 22, 2010

John Currin Comes to Boston

On March 10th the New York artist John Currin spoke at the Museum of Fine Art in Boston to talk about his career. The entire ARA Boston cohort took a field trip to see this presentation. Here are some of his more memorable / most discussed quotes from the evening.

"I wanted to show the compassion, sympathy, and love that can only be achieved on a woman's face." -- When explaining why he painted women's faces with beards.

"It was a fake version of a good idea that turned out better than the original idea. The one (painting) at the end of the idea, the rip-off, when painting the idea has lost its meaning, is often the most successful."

"You can't make a completely serious painting with a banana."

"I didn't want to be known as the porn guy."

"When otherwise good artists start painting from life their work always starts to turn dull and depressing."

If any of these quotes move you, feel free to comment.


Tuesday, March 9, 2010

Materials Lecture

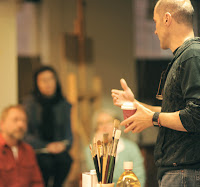
Anyone who has worked with Juan Martinez knows that he is an encyclopedia for materials and procedures used by the old masters as well as the best practices used today. He gave us a three hour question and answer period to pick his brain. Here are the highlights of that lecture that stood out for our ARA students:

One point that was helpful to me was that he said house painters need several coats to get the correct tone and color so why should your figure painting's background, shadows, and lights be any different. --Elise Zoller

In the end you'll end up with your own process, materials related. I liked how he showed that he had tested different paints and materials over a long period of time. To work with and really learn any paint, medium, or material takes a great deal of testing and patience. --Liz Beard

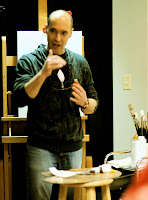
I came in late and only saw the end of his demonstration process and I was impressed to see what can be accomplished in just three hours. --Brian Krasinski

I liked that he had a matrix of neutrals showing that varying kinds of neutral colors can be made using different colors of paint. I also liked when he said that the highlight on an object moves with the viewer, while the shadows remain in the same position. --Sean Krajnik

If you stand back and look at your picture you'll see that the shadows appear flat regardless of their level of rendering. Spend more time in the lights, because that is where the viewer sees the real three dimensionality of the form. --Emmy De Musis

If you care about your work you should try to do all of your painting on the best archival practices so that it stands the test of time. --Sarah Bird

As long as it's a good piece of work, someone will find a way to preserve it. --Cindy MacMillan


Tuesday, March 2, 2010

Juan's Portrait Demo

This past week the portrait artist and ARA Toronto instructor Juan Martinez came to the school to teach a grisaille painting workshop. Along with this workshop he treated us to a painting demonstration. Here is a description of the procedure with a few of his painting tips accompanied by some photos of the experience.

  • He begins the painting process by blocking in the portrait with thinned down Burnt Umber.
  • He continues to use the thin Burnt Umber mixed with black to block in the shadow shapes.
  • Next he blocks in the darkest parts of the shirt until all of the shadow shapes have been described.
  • Then with gold and grey colors he blocks in all of the mid-tones.
  • Then a reddish midtone for all of the warm parts: nose, cheeks, etc.
  • He roughly blocks in the darker lights as well.
  • He advises not to use thicker paint when you're still trying to establish the drawing of the portrait.
  • Finally thicker paint is applied to finish off each of forms of the face: mouth, nose, eyes, cheek, forehead, ear.